
Building the ALASKA
« on: February 11, 2012, 11:44:06 PM »
Hi All
I thought you might like to see how I’m getting on with building the Alaska Steam Launch.
I was the one who resurrected Miranda and didn’t have clue how to start but with kind help of the forum I got the hull finished.
But I’m afraid that building a boat from someone else’s plans and a boat that has been made
beautifully by others, left me thinking that I wanted to do build something that had not been done before.
So I picked the Steam launch Alaska. You can see her from this website
http://www.thames-steamers.co.uk/
I lived in Windsor for 51 years and have seen her steaming along and thought what a beautiful boat.
So having contacted the owner I found out that he had four sheets of plans with the basic dimensions on, unfortunately he did not wish to post them to me in Wiltshire in case they got lost
So I arranged with a company close to the Alaska office to have them copied. That was a mistake as I got 4 photos of the plans at a cost of £50.00.
They did however give us an understanding of the shape and dimensions.
Now I say us because of the wonderful work done by Greg Simpson (gondolier88).
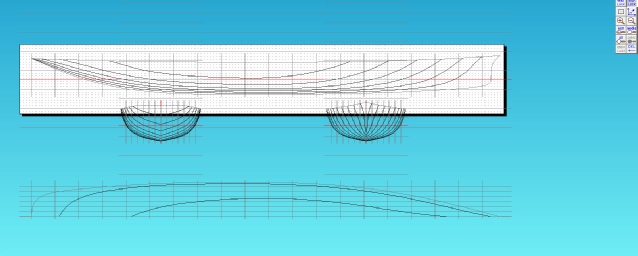
I sent him a copy of the pictures and he produced the shape in Delftship. Without this I would not have got off the ground.
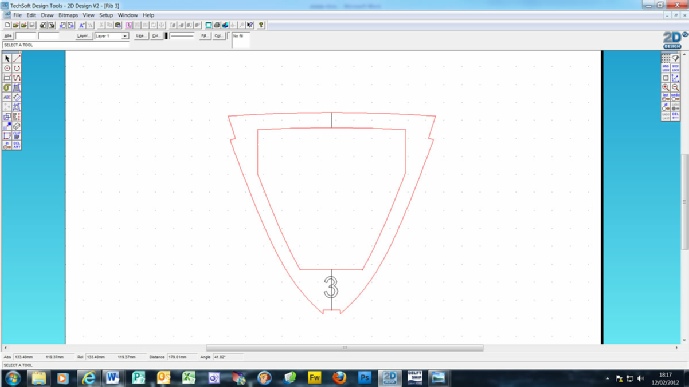
I then used a program called 2d design and with a DFX output from Delftship I could produce the lines for the Ribs.
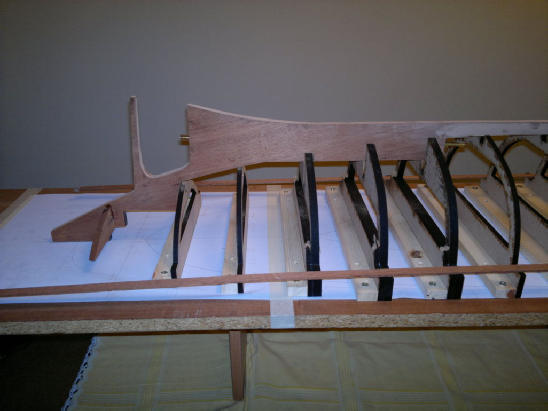
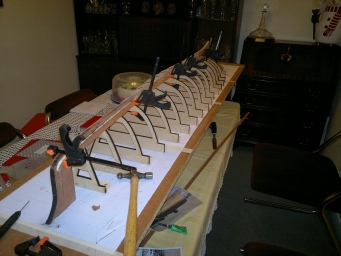
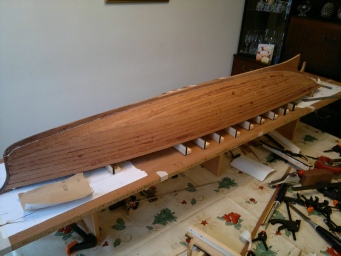
From this I was able to produce the ribs in cardboard to test the shape.
Now I should explain at this point that I am very privileged to have a part time job as a technician at a technical college that has a laser. This enabled me to cut out a perfect rib.
Some may say that this is cheating but you still have to have the skill to use it.
So after getting it right in cardboard I made all the ribs out of MDF, they'e going to be junked after so did not wish to waste good wood.
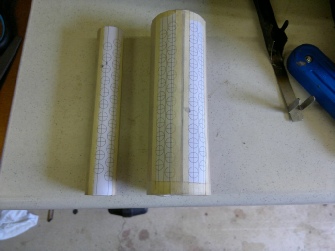
I'll show you how the planking and the keel went later
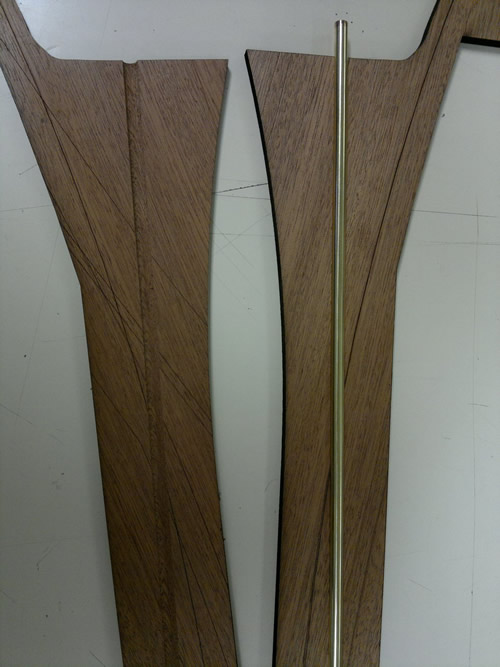
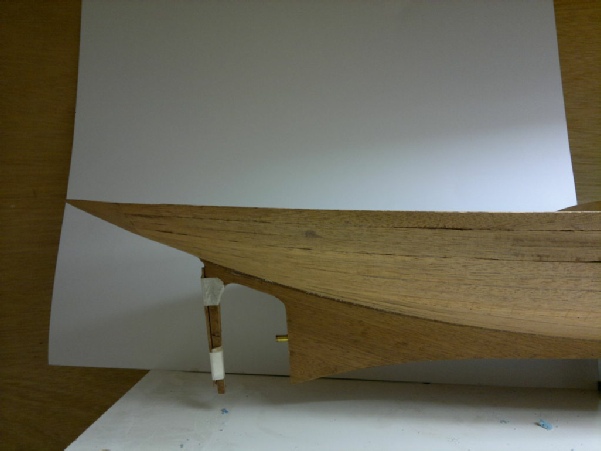
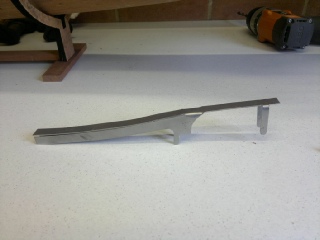
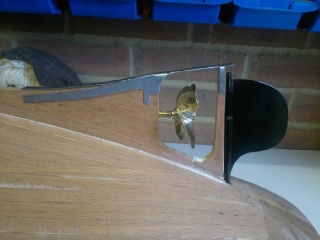
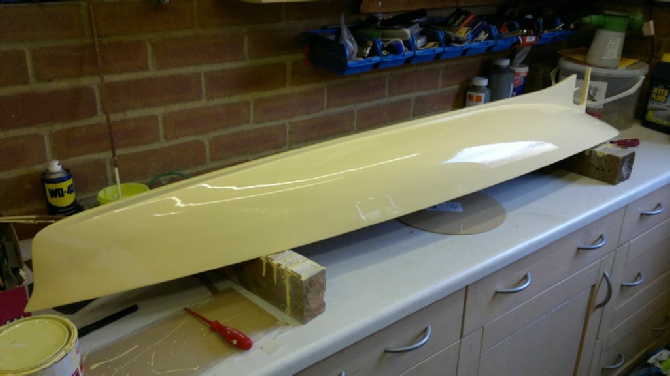
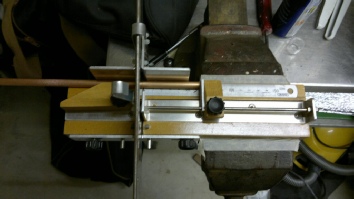
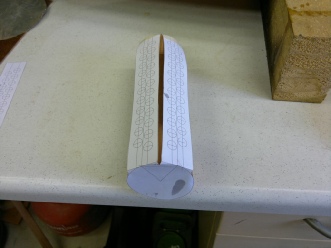
The next part of the job was to make the keel, this had a problem in that using 3/8" mahogany I would have to drill a 6mm through 14” . The solution you can see in the picture below
I used two pieces of 3/16 mahogany and ran a 6mm bullnose cutter along the length.
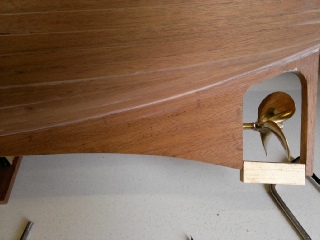
Fitted the outer housing for the shaft and glued the two halves together. Job done.
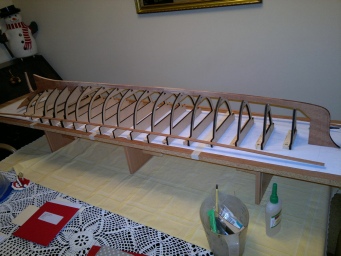
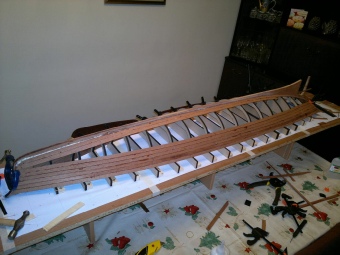
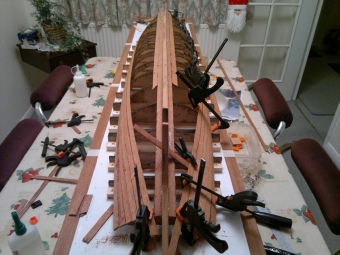
Now for the planking. This was done with 1/8 x 1/2 mahogany.
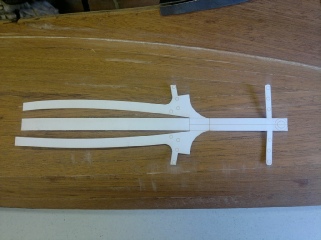
That’s me up to now, I’ve drawn the inside ribs just need to cut them out and fit.
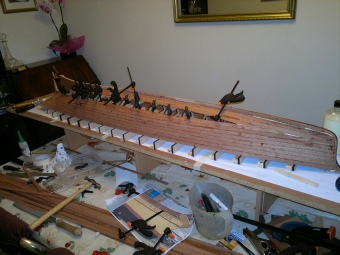
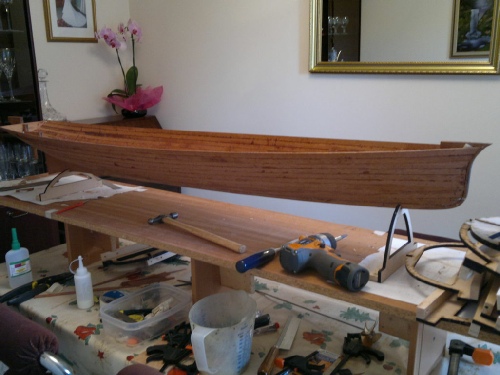
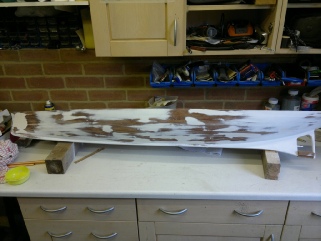
Fitted a few ribs to allow me to sand the hull down and get it painted
Finally got some time between GCSE & A level projects to finish the stern
I'm of on Thursday to take a sail in ALASKA down to the dry dock, so will get all the pictures and measurements I need to continue it.
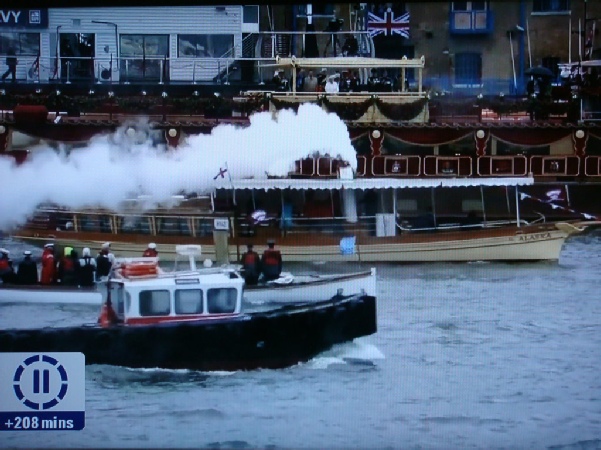
First must send a picture of Alaska in front of the queen.
Broke the keel, as the grain in the mahogany when across, have now replaced it with a down grain.
Rudder made and just bent up the rudder guard. I'm just getting the courage to paint the hull !!
wish me luck
Well a lots happened since I last posted
Changed the engine, Changed the boiler, painted the hull etc.
The first change was the engine, the original idea of fitting a tiny power 2V-10M turned out to be much to big and out of scale so I've got a TVR that fits the scale perfectly
I've also changed the boiler to a "Yarrow" design as per K.N. Harris. This allows me to make it look like the original on the outer casing and also allows me to put the funnel in exactly the right place no matter where the boiler is. I would like to thank George Thomson for his invaluable and continuing help in this.
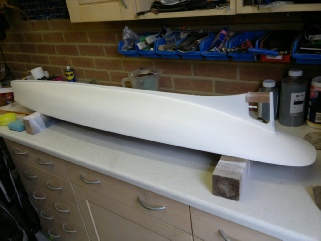
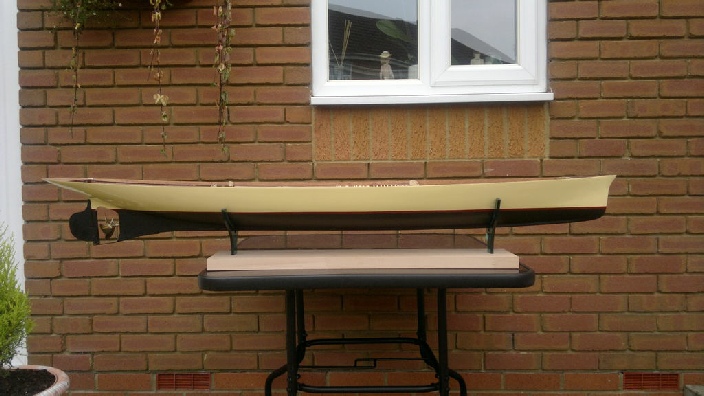
The hull has been filled and painted, Peter green the owner of Alaska gave a tine of the same paint she was painted with in the refit, It's international polyurethane and it's fantastic stuff just brush it on and wait for a very smooth finish.
If only it had been that simple, first I applied the GRP resin to the inside of the hull, this was fine, then I applied to the outside, well it all parted like oil on water and had to rub the whole thing down back to the wood. Tried a second time and the same thing happened I can only think that it may have been cleaning the outside down with white spirit and the residue remained in the wood.
any way got a standard wood primmer and bob's your uncle.
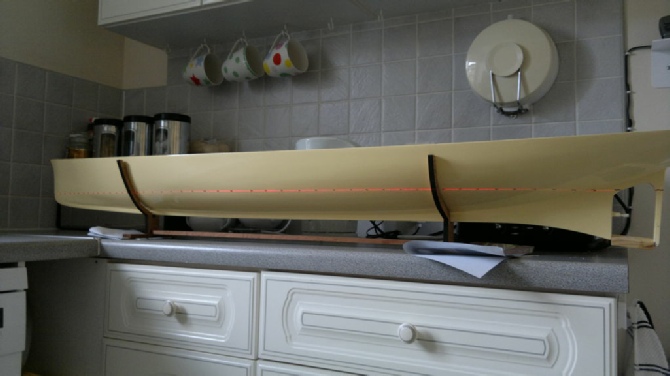
It has 5 coats, just need to do the red water line and then the matt black anti foiling for the bottom. Peter has also very kindly donated this as well. I'm not sure how you get a line on the boat to paint without putting it in a tank so I used the kitchen and a laser when the wife was out !!
Now this is where she gets the 6th coat of paint as I used the wrong pen to mark the line, it turned out to be indelible and permanent !!
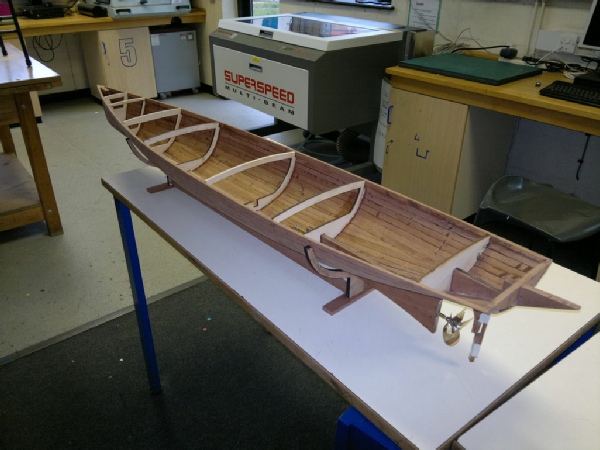
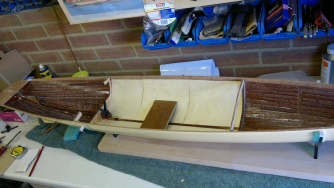
I've skinned the engine and boiler area and will rib it to match the original hull
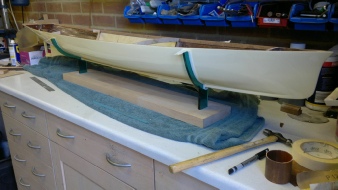
As the hull has a nice coat of paint I thought I'd better treat her to a new stand
The holders are made from 8mm Aqua marine Acrylic, Just to simulate water !.
As for the engine it's made and runs nicely at 30 psi with a surprising amount of torque.
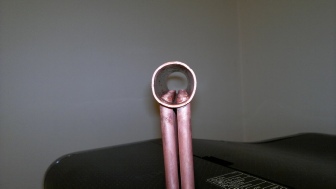
The boiler will be 6" long with 2.5" 5/16 tubes connecting the 2" top tube to the two 1" bottom mud tubes Now 5/16 copper tube is about £3.50 a foot. 10Mtrs of micro bore 5/16 tube £18.00 from eBay. Thank you again George.
Got a jig for cutting the tubes as a pipe cutter flanged the ends over.
For those who noticed the golf clubs, yes I play golf and my handicap was 9 since taking up modelling i'm up to 13!!
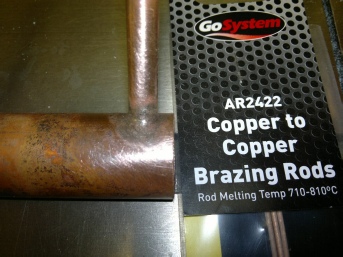
I had quite a fright when I went to the Bristol show to buy the silver solder, I need 15 rods at a cost of £79.00, ouch
While walking round B&Q I found some copper braising rods, I was going to braze them with brass but thought i'd try these. As I served my time as a welder and sheet metal worker I still have the skills to weld.
It made a great weld with out and additional flux and I must confess , not a lot of cleaning.
So 4 rods for £3.48 Bargain.
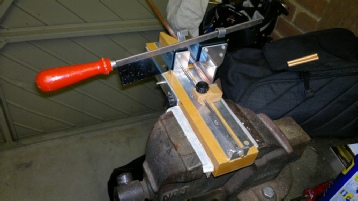
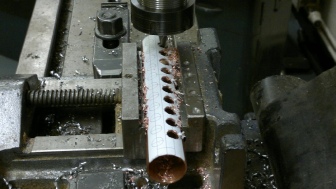
I made a template for drilling the holes at 60 deg on the top tube.
I've cut the holes with an 8mm slot drill as it makes a neater hole.
I'll let you know how I get on with the boiler. Shouldn't be so long next time as I don't play golf in the winter
Finished the painting, how I ever got the water line to be straight I will never now, I was lucky, that was the trickiest thing I've done so far.
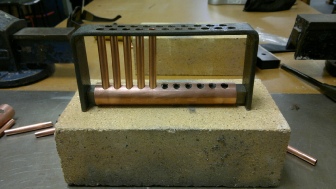
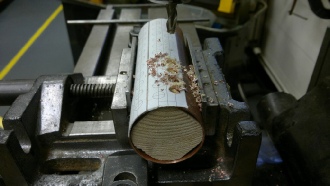
Now it's time to start on the boiler, first we have to cut the holes in the mud tubes, I've done this with a 5/16 slot drill on the mill, this way the hole will be vertical and round!.
Then I had to build a jig to hold the down tubes .
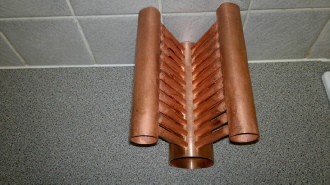
Now the big moment using B&Q copper brazing rods at £3.48 for 4.
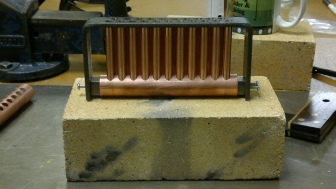
Looks a bit messy but they all do just after brazing, off to the chemist know for some citric acid to clean them up then it's make another jig to hold both of these and braze the them into the top 2" tube.
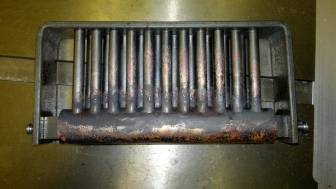
Well here they are after 30 min's in Citric acid
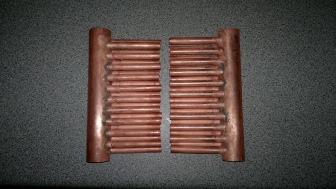
Well after due trial and tribulations I can definitely recommend the B&Q copper to copper brazing rods.
flowed a treat. Job Done.
 Return to the Top